Creating pages
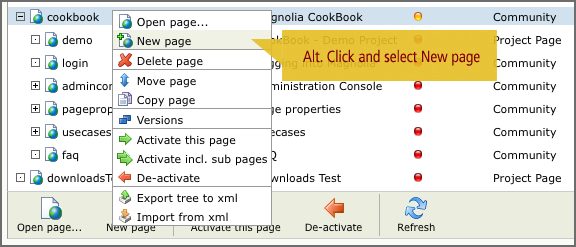
Step 1: Create the pageIn the Website workspace of AdminCentral select a page in the tree where you want to add a new child page. Then either click on the "New page" button on the toolbar at the bottom, or right-click on the selected page to bring up the context menu and select "New page" from there. |

|
A page named "untitled" will be inserted into the tree as a child of the selected page. |
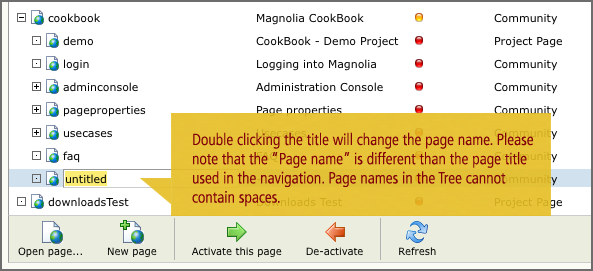
Step 2: Rename the page
|
Double-click on the name to enter a new value. Since page names are used to construct URLs only letters [A-Z] [a-z], numerals [0-9] and underscores _ are allowed. Blank spaces and the following characters are disallowed: & @ \ / ( ) { } [ ] | ^ , ; : ` ' " = > < + * ! # $ % ~ If you enter one of these by mistake then it will be substituted with a dash (-) when you press enter. |
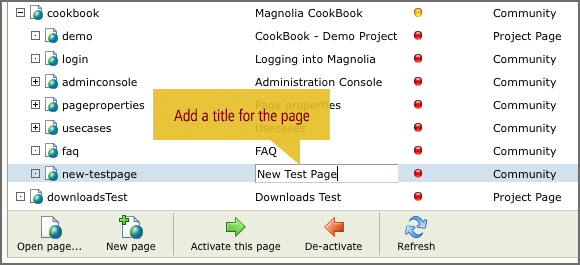
Step 3: Add a browser window title
|
Double-clicking on the "-" character in the Title column for the new page allows you to enter a new value for the browser window title. You can give any title you want and unlike page names there are no disallowed characters.
|

Step 4: Choose a page template
|
Double clicking on the word in the Template column for the new page allows you to choose a different template from a dropdown menu. Project pages should use the "Project Page" template that provides the "JBoss Community" header and footer along with the community look & feel. |